Not all backsplash tiles install the same way. Glass and ceramic are the two most popular materials, but they behave differently during installation — different mortars, different cutting techniques, different tolerances for error. This guide covers the specifics of each material so you get a clean, lasting result.
How to Install Ceramic Tile Backsplash
Ceramic is the most forgiving backsplash material for DIYers. It's affordable ($2–$8 per square foot), easy to cut, and works with standard thin-set mortar.
Ceramic-Specific Tips
Mortar: Standard modified thin-set in gray or white. Ceramic is opaque, so mortar color doesn't affect appearance.
Cutting: A manual score-and-snap tile cutter handles straight cuts on most ceramic tiles. For curves or notches around outlets, use a wet saw or tile nippers. Ceramic cuts cleanly and predictably.
Setting: Ceramic tiles are relatively light, so they hold well on vertical surfaces without slipping. Apply mortar to the wall with a 1/4" x 1/4" notched trowel, press tiles firmly, and use spacers for consistent joints.
Grouting: Ceramic works with both sanded and unsanded grout depending on joint width. Sanded grout for joints wider than 1/8", unsanded for narrower gaps.
Common Ceramic Pitfalls
- Cheap tiles chip easily — invest in quality ceramic or step up to porcelain for high-traffic areas
- Glazed surfaces are slippery — mortar adhesion can suffer if you don't back-butter glossy tiles
- Inconsistent sizing — budget ceramic tiles can vary by 1/16" or more. Dry-fit first to catch any sizing issues.
How to Install Glass Tile Backsplash
Glass tile is beautiful but demanding. The translucent material reveals everything behind it — mortar color, trowel marks, even the wall surface. Precision matters more with glass than any other tile material.
Glass-Specific Tips
Mortar: Use white, non-modified thin-set specifically rated for glass tile. Gray mortar shows through and muddies the color. Some installers prefer glass tile adhesive (a premixed mastic) for small backsplash areas.
Cutting: Glass requires a wet saw with a glass-cutting blade. Do not attempt to score and snap glass tile — it shatters unpredictably. Cut slowly, let the blade do the work, and expect some waste from breakage (order 15% extra).
Setting: Apply mortar to the wall in thin, even layers. The notch ridges must be flattened slightly — visible ridges show through transparent glass. Some installers apply mortar to the back of each tile instead of the wall (back-buttering only) for maximum control.
Handling: Glass tiles have smooth, non-porous backs that don't grip mortar as well as ceramic. Press firmly and check after 10 minutes to make sure tiles haven't slid.
Grouting Glass Tile
Use unsanded grout only. Sanded grout scratches glass surfaces permanently. Apply carefully with a soft rubber float, and clean quickly — glass shows dried grout residue more than any other material.
Common Glass Tile Pitfalls
- Using the wrong mortar — this is the most common glass tile failure
- Trowel marks visible through tiles — flatten ridges or back-butter for a clean look
- Cracking during cutting — use a proper glass blade and don't force the cut
- Scratching during grouting — soft float only, no abrasive pads
Where to Buy Tempered Glass Kitchen Backsplash
Tempered glass backsplash panels (not tiles) are a different product — large sheets of heat-treated glass that cover the wall in one or a few pieces. Sources include:
- Specialty glass fabricators — custom-cut panels in any size and color. Expect to pay $25–$50 per square foot.
- IKEA — offers standardized glass panels in limited sizes and colors. Affordable but limited in customization.
- Online retailers — companies like Dulles Glass, ABC Glass, and others ship custom-cut panels.
- Local glass shops — often the best option for custom sizing and color matching.
Tempered glass panels offer a seamless look similar to aluminum panels, but they're heavier, more fragile during transport, and limited in how they handle cutouts for outlets.
Glass vs. Ceramic vs. Aluminum: The Quick Comparison
| Factor | Ceramic | Glass | Aluminum |
|---|---|---|---|
| DIY difficulty | Easy | Hard | Easy |
| Grout required | Yes | Yes | No |
| Heat resistance | Good | Good | Excellent (300°F) |
| Maintenance | Moderate | Moderate | Very low |
| Customization | Limited colors | Many colors | Any color (RAL) |
| Installation time | 2–3 days | 2–3 days | 1–2 hours |
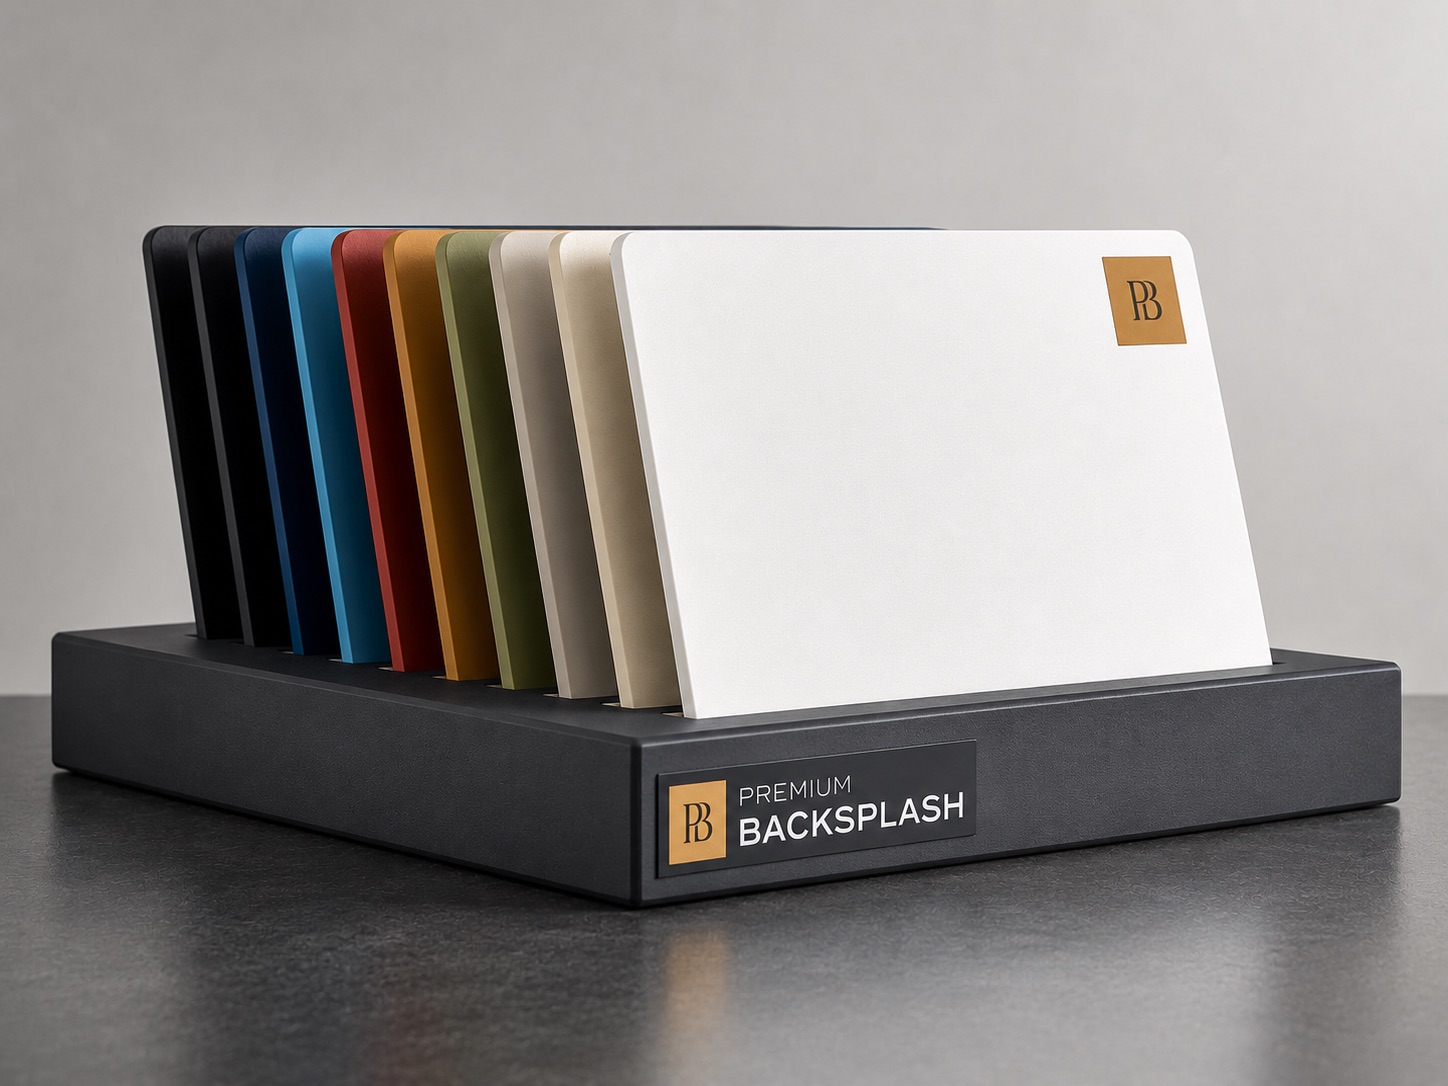
An Alternative Worth Exploring
Both glass and ceramic tile require grout, careful installation, and ongoing maintenance. If you want the clean, modern aesthetic of glass without the fragility, or the simplicity of ceramic without the grout lines, aluminum backsplash panels offer a compelling middle ground.
Premium Backsplash panels are custom-cut from coated aluminum in any color — including glossy finishes that mimic the reflective quality of glass tile. They're heat-resistant up to 300°F, scratch-resistant, and install in hours over existing surfaces. No mortar, no grout, no glass-cutting blade required.