Removing a tile backsplash is messy, time-consuming, and almost always damages the wall behind it. But if you're updating your kitchen, it's often a necessary step — unless you choose a material that installs over what's already there. This guide covers how to remove backsplash tile properly, how to repair the wall afterward, and when you can skip demolition entirely.
Before You Start: What to Expect
Removing backsplash tile typically involves:
- 4–8 hours of work for a standard kitchen backsplash
- Drywall damage — mortar bonds to the paper face of drywall, so sections of drywall will come off with the tiles
- Dust and debris — tile removal creates significant mess
- Potential plumbing/electrical encounters — behind old backsplashes, you may find outdated wiring or plumbing that needs attention
Set realistic expectations: this is a demolition project. Plan for wall repair afterward.
Tools for Removing Tile Backsplash
- Safety glasses and work gloves (non-negotiable)
- Dust mask or respirator
- Drop cloths for countertops and floors
- Painter's tape to protect adjacent surfaces
- Putty knife (stiff, 3–4 inch)
- Chisel or flat pry bar
- Hammer
- Heat gun (optional, for stubborn adhesive)
- Utility knife for scoring
- Joint compound and drywall tape for repairs
- Garbage bags or bins for debris
How to Remove Tile Backsplash: Step by Step
Step 1: Protect the Area
Cover countertops with drop cloths or cardboard. Protect the sink and stovetop. Remove everything from the counters. Tape off areas you don't want damaged.
Turn off power to any electrical outlets in the backsplash area at the breaker panel. Confirm with a voltage tester.
Step 2: Remove Outlet Covers and Fixtures
Take off all switch plates, outlet covers, and any decorative trim. If there's caulk along the countertop edge, score it with a utility knife to separate the backsplash from the counter cleanly.
Step 3: Start at an Edge or Loose Point
Find a starting point — a loose tile, an edge, or a corner. Insert a stiff putty knife or chisel behind the tile at a 30-degree angle. Tap gently with a hammer to break the mortar bond. Work the tool behind the tile to pry it away from the wall.
Step 4: Work Methodically Across the Wall
Continue tile by tile, inserting the chisel behind each one and prying outward. Some tiles will pop off cleanly; others will take chunks of drywall with them. This is normal.
Tips for stubborn tiles:
- Apply heat with a heat gun for 30 seconds to soften the adhesive
- Work from the top down — gravity helps
- Don't pry too aggressively or you'll punch through the drywall
Step 5: Remove Remaining Mortar and Adhesive
After all tiles are off, the wall will have patches of dried mortar and adhesive. Scrape as much as possible with a wide putty knife. For thick mortar, use a oscillating multi-tool with a scraping blade — it's far more efficient than hand scraping.
Step 6: Assess and Repair the Wall
Inspect the drywall. You'll likely find:
- Torn paper facing — skim coat with joint compound
- Gouges and holes — patch with drywall compound, tape seams, and sand smooth
- Water damage — replace the affected drywall section entirely
- Missing sections — cut out damaged drywall and install new pieces
Plan for at least one day of wall repair and drying time before installing new backsplash material.
How to Remove Old Backsplash: Special Cases
Mastic-Adhered Tile
Older installations used mastic (organic adhesive) instead of thin-set mortar. Mastic stays gummy and is easier to pry tiles from, but the residue is harder to clean. Use a heat gun and adhesive remover.
Thin Tile on Plywood
Some older kitchens have backsplash tile on plywood instead of drywall. In this case, it's often easier to remove the entire plywood sheet rather than individual tiles.
Wallpaper-Backed Tile
Some decorative backsplashes were actually tile-look wallpaper. These peel off with steam or a wallpaper remover solution.
How to Remove Kitchen Backsplash Without Destroying the Wall
Complete wall preservation during tile removal is nearly impossible if the tiles were set with mortar. However, you can minimize damage:
- Score around each tile with a utility knife to limit tearing
- Use thin, flexible tools rather than thick chisels
- Work slowly — rushing causes more damage than anything else
- Accept some damage and plan for skim coating the entire area
Skip the Demolition Entirely
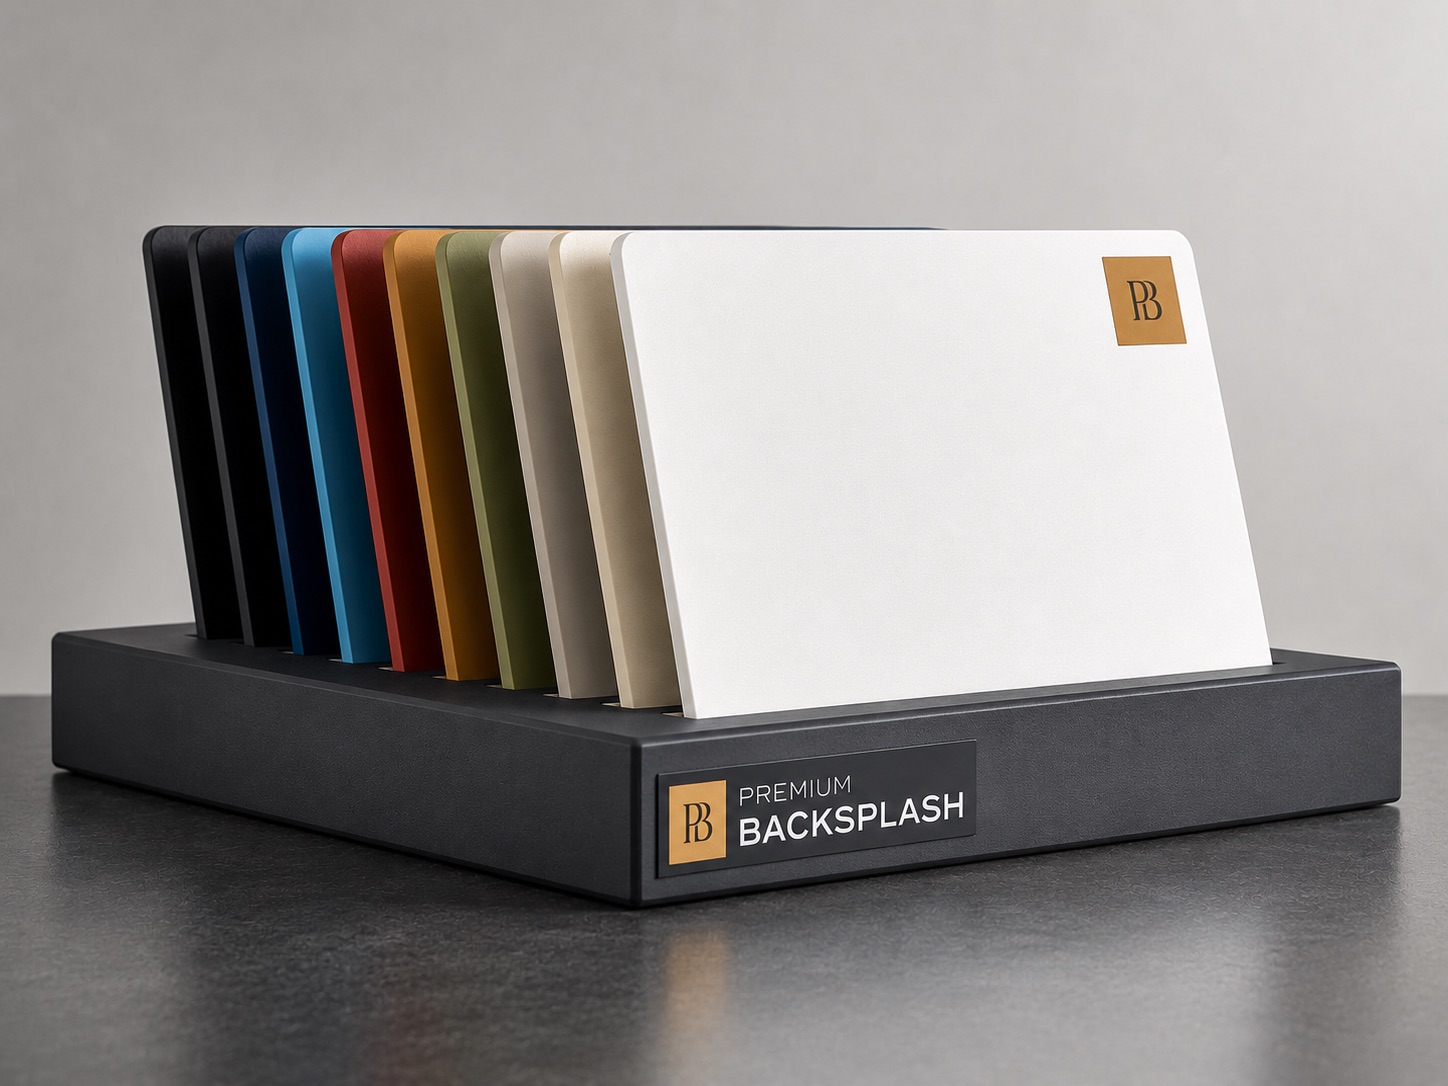
Here's what many homeowners don't realize: you don't always have to remove old backsplash to install new material. Aluminum backsplash panels can install directly over existing tile, avoiding the entire demolition process.
Premium Backsplash panels mount over your current backsplash with construction adhesive. No tile removal, no drywall repair, no dust, no multi-day disruption. The panel covers the old surface completely with a seamless, custom-colored finish. If your goal is a new look — not the satisfaction of swinging a hammer — installing over existing tile is faster, cleaner, and less expensive than a full tear-out and re-tile.